Apr 06 2017
Configure Windows Managed Service Accounts
Windows Managed service accounts (MSA) appeared in Windows 2008 R2 Server. MSA provide dedicated accounts for each service without the hassle of managing password assignment or reset. Less management, more security.
However, a single account cannot be used across multiple servers. This could lead to many service accounts within a domain but this is not a big deal.
Setting up a service account requires 2 major steps:
Create it on the Active Directory domain controller and install it on the machine where the service will run.
Add Service Account on Active Directory
On the domain controller, launch the two following commands in Powershell to create the account. It cannot be done through a graphical user interface:
Import-Module ActiveDirectory
New-ADServiceAccount -Name Service_Account -Enabled $true
The Windows account shows up under “Managed Service Accounts” in Active Directory Users and Computers. You have to check “Advanced features” in the View tab beforehand.
Then assign the account to the host where the service will run:
Add-ADComputerServiceAccount -Identity Target_Server -ServiceAccount Service_Account
Configure the Service on the Target Host
On the target machine, add the AD module for Powershell feature:
Add Feature navigating to:
Remote Server Administration Tools
Role Administration Tools
AD DS and AD LDS Tools
Active Directory module for Windows PowerShell
Next install the managed service account, still in Powershell:
Install-ADServiceAccount -identity Service_Account
Finally, you can configure the service startup with the managed service account, under the Connection tab.
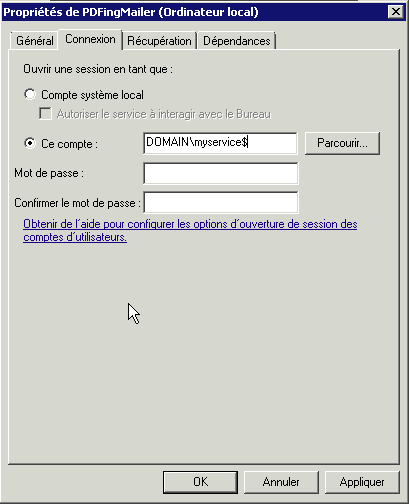
Launch the service with DOMAIN\Service_Account$ leaving the password field empty. Do not forget to append the $ to the account name!
Check this post out if the service does not start after rebooting the server. It could be linked to some security policy settings that need to be changed.