Mar 09 2017
Move RDS profiles to Another Volume/Drive
You’re in charge of a Remote Desktop Services (RDS) server but unfortunately, the C: drive starts running out of space, user profiles being on that same volume.
Lucky enough, a huge amount of space remains on the D: drive, but how shall I move RDS profiles?
Set Path for New Profiles
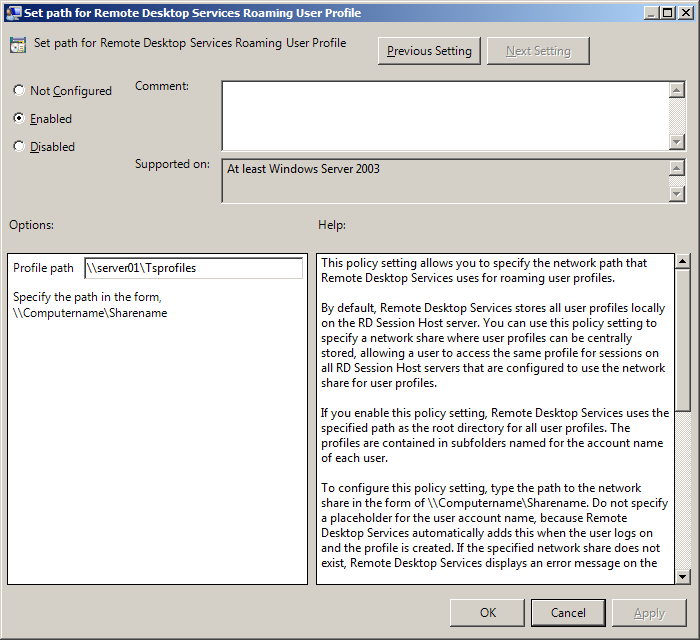
You can set up a GPO that creates new profiles on the D: drive like this:
-> Computer Configuration
-> Administrative Templates
-> Windows Components
-> Remote Desktop Services
-> Remote Desktop Session Host
-> Profiles
-> Set path for Remote Desktop Services Roaming Profiles
This is working for new profiles but older ones need to be moved.
Move Existing Profiles
– Migrate user folder from C: to the new drive and assign proper rights.
If older profiles connect with a temporary profile, you should also:
– Remove the entry in
-> Control Panel
-> User accounts
-> Configure user profiles advanced properties.
– Remove the registry entry HKLM\Software\Microsoft\Windows NT\CurrentVerison\ProfileList\S-1-5-21… with a ProfileImagePath key matching the user profile path
Advantage: All new profiles will create in this new location.
or
Edit the path in the above registry key, move the profile folder to the new location and assign user’s rights.
New profiles will still be created on C: but you can migrate some on D: as you wish, and spread data on 2 volumes.
The best is clearly to define a GPO right from the start on a dedicated volume other than C:. If not you will have to move RDS profiles sooner or later.